Replacing Controller Switches
Professional Biomat
TOOLS: Philips screwdriver
TIME: 5 minutes
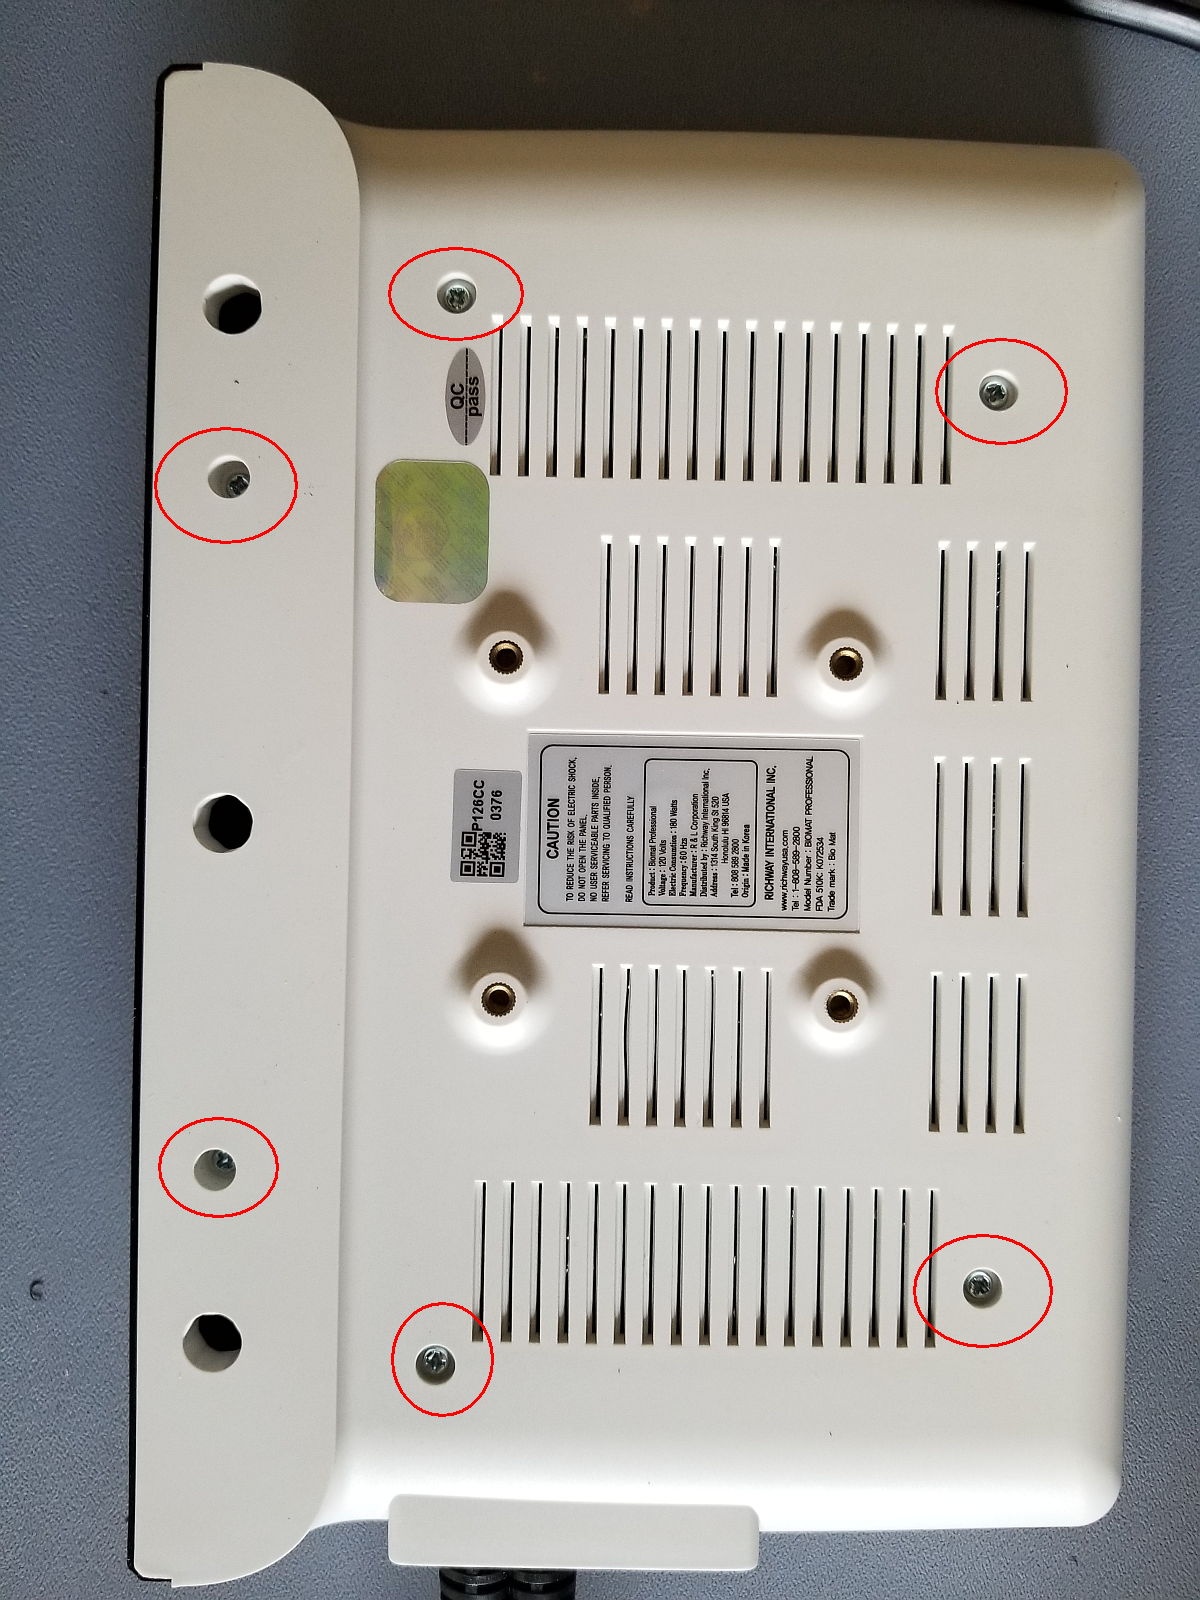
1) Remove the 6 screws on the back of the controller, shown in the picture below.
2) Remove the 6 switch panel screws to removed the switch panel.
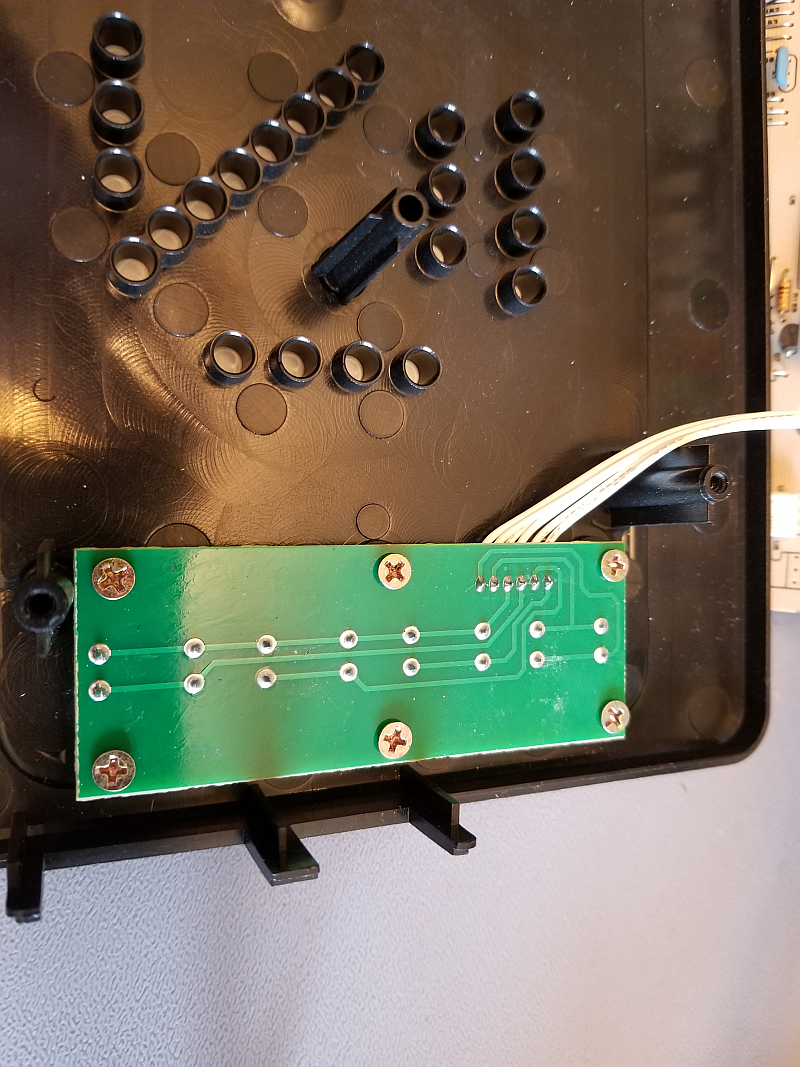
3) Unplug the switch panel.

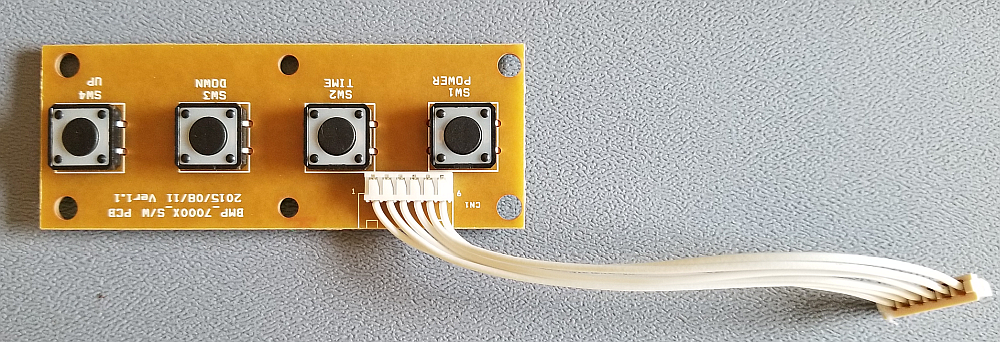
4) Replace the switch panel with a new one.
5) Plug in the switch panel.
6) Put the 6 screws back to hold the planel.
7) Align the main circuit board with the holes and posts.
8) Replace the back cover using the 6 screws as shown in the first image.